Sunday, December 28, 2014

✨ANNOUNCEMENT!✨

Hello!!! Sorry it has been so long, I have been very business developing and designing my VERY OWN.....

Wait for it.....

FALSE EYELASH LINE! 

I will have 8 styles coming out initially in approximately one month! 

My website: www.amyjunelashes.com
My Instagram: @amyjunelashes

I will be making a Facebook and Twitter as well, so stay tuned!!! 

I have placed a few photos below of a few styles! 

(Savannah)
(ADELINE)
(Amelia)

HUGS,
Amy June

Saturday, November 8, 2014

I joined the team! | Makeup Eraser

What girl doesn't want to remove her makeup easier???

Prettypink.Makeuperaser on Instagram sent me a makeup eraser to try. Needless to say, I was very skeptical as a lot of products have hype because of who promotes them and just overall marketing. When I got it, even my husband was like, that is just a cloth, you could wash your car with it (of course a guy would think of cars). 

I used it last night for the first time, and signed up literally 10 minutes after. It removed my mascara was such ease. I have sensitive eyes and it didn't sting my eyes at all! The cloth was covered in face makeup, eye makeup, brows and mascara in no time! It worked wonders. 

They have an affiliate program that you can join so that you don't have to invest in all of the erasers and kits up front, which is nice! 

I will be doing a video very soon. I didn't do one last night because I didn't have heavy heavy makeup on and i feel that will pick up on camera better. 


If you want to check it out, please visit: www.amyjunemakeup.makeuperaser.com 

Have a great Saturday everyone!

HUGS,
Amy June

Wednesday, November 5, 2014

Lashes | What makes a good pair?

Opinions!!!!

What do you look for when purchasing a pair of false lashes???


Sunday, November 2, 2014

Makeup Brush Cleaning!

Happy Sunday everyone! I hope everyone is having a great weekend so far. It has actually cooled down a tad here in California, which is a relief, however it is going to be back in the 80's mid week. BOO! Anyways, after all of the Halloween makeup I did on Friday, some of my brushes definitely needed some TLC. I actually did my normal steps, however added an extra step since the brushes were covered in red, black, purple, blue, green, etc shadow and FAKE blood! 


What you will need:

1. Plate
2. Extra Virgin Olive Oil
3. Dawn Anti Bacterial Dish Soap
4. A sink
5. Luke warm water
6. Paper Towels (2 sets folded over a few times)

HERE WE GO:

  • Place olive oil and dish soap on plate and let them overlap a little.
  • Swirl each brush in the mixture and set them down on the paper towel to soak for a few (do not get wet)
  • After all brushes have the mixture on them, it is time to get them wet.
  • Using luke warm water and holding the brush downward, get the brush damp. Then, swirl on the palm of your hand (of if you have a cleaning mit, such as Sigma's then use that). You should see a ton of makeup come off. 
  • (EXTRA STEP- not necessary unless your brushes are really dirty)- Put them in the olive oil/dish soap mixture and swirl around again. 
  • Continue doing it to every brush and rinsing them perfectly clean (facing downward of course still).
  • Shape them the way you want them to dry, and lay them on the next set of clean paper towels to dry.
I have tried so many methods and I can honestly say this works the best for me. It is time consuming as any other method is, however it gets them very clean. The antibacterial soap kills germs and the olive oil conditions the brush hairs. TRY IT OUT! Please let me know how you like it!

HUGS,
Amy June

Saturday, November 1, 2014

Hello November

Hello November!


What is your favorite part about November? 


HUGS,
Amy June

Halloween Looks 2014!

HAPPY SATURDAY!

I am so sorry I failed on posting my last and final looks and getting them up before Halloween. No excuse! In any case, I have placed all of my looks that I did on myself below! As well as a look I did on my husband and three clients! Which one is your favorite? 


My Halloween looks 2014

Client-Brittany as Twisted Alice in Wonderland

Client- Megan as a skull

Client- TJ as a Zombie

Client Hubby :)- as a sugar skull or as my son says Jack Skellington (haha)


Hope everyone had a safe and fun Halloween. There were 3 young girls killed during Trick-or-Treating last night. Don't take life for granted- as it can be gone in the blink of an eye. 

HUGS,
Amy June

Thursday, October 30, 2014

Halloween Makeup Look #9 | Pop Art Character


I am trying to get up the remainder of my looks before Halloween comes and go's!

This look is simple to do for a last minute halloween look, it just takes time and patience.


Here is what I did to achieve this look:

Step 1: Put your regular foundation, brows, eye makeup on! (You can skip the blush and bronzer- save time! ;) )

Step 2: Using a q-tip and white face paint start by putting dots on individual areas of your face such as forehead, then cheeks, then chin. (As you can see they are not perfect, they don't have to be).

Step 3: While those are drying outline your tear and drop under whichever eye you prefer using a liquid or gel liner. I then filled mine in with a q-tip and wet eyeshadow. 

Step 4: Using the same liquid liner I used for the year, I used to place down the center of my nose, on the side of my nostrils, across the side of my face under my cheek bone, on my collar bone and on my chest. (This does look funny straight on, so map out the lines where you would want them to be for photo purposes).

Step 5: I filled in my lips using a very bright pink lipstick by Inglot. I then outlined my lips with black face paint and used white paint to create the shadow in the center. 

Then you are done! Please hashtag #amyjunemakeup if you recreate this look or any others as I would LOVE to see! 

Hugs,
Amy June

Wednesday, October 29, 2014

Halloween Makeup Look #8 | Bride of Chucky

Hey guys,

So, today is my 4 year wedding anniversary with my husband, but I am a little behind on posting my Halloween looks on my blog. I should have two up tomorrow and hopefully two up on Friday to complete my 2014 Halloween Looks! 

This look is the "Bride of Chucky", it was a very simple look. Please read below to see exactly how I did it.


I started this look off with already having my makeup done from the day (I did the look after I got off work). I started by taking a glue stick and pasting it over my natural eyebrows. I then covered my brows in translucent powder and repeated the step until my brows were flat to my skin. Then, I put concealer on them that was close to my skin tone. 

Eyeshadow: I used black eyeshadow blended in the crease with thick eyeliner. I have seen this look done several ways, so you can use any colors you would like as long as it is dark underneath the eyes.

Brows: I used black gel eyeliner and an angled brush to achieve these crazy brows. I also used gel liner to place the beauty mark on my upper lip.

Lips: I used Night Moth lip liner by Mac covered by a black lipstick that was blended out. 

And that my friends....is the finished look! I hope you enjoyed and more to come tomorrow!

HUGS,
Amy June

Monday, October 27, 2014

Halloween Makeup Look #7 | Not so creepy CLOWN

#7!!! And I am falling so behind. I have several looks after #7 to still share! So please stay tuned.

Who got me inspired to do this look was Nicole Guerrero. If you aren't sure who she is, visit YouTube and type her name into the search bar. She is very talented as well as very entertaining so the videos are never boring.

For this look, I used a very small amount of things. What I used:


  • White face paint
  • BH cosmetics 88 shadow matte pallet
  •  Liquid Eyeliner
  •  Red Lipstick
  • Red face paint (my nose) 
  •  False lashes

I used the shadow over the white face paint and a Real Techniques shadow brush to blend the rainbow colors in my skin. I wasn't really sure how I was going to do it so my idea changed a bit as I went through the look. The part I disliked the most was how my brows turned out. I should have used the glue stick technique as I did with my Bride of Chucky look. It would have made them more smooth looking instead of the black getting messed up with my brow hairs. 

In all, I had a very good response posting this look on my Facebook and Instagram! So hope you enjoy! 

HUGS,
Amy June

Tuesday, October 21, 2014

Halloween Makeup Look #6 | Bedazzled Day of the Dead

Happy Tuesday!!!

This Halloween makeup definitely isn't getting old for me. Here is my number 6 Halloween makeup look. 

{Pretty Day of the Dead Makeup}

(This photo was taken under a blue-white light)


(This photo was taken under a more natural white light) 

What I used to achieve this look:

Step 1- Painted my entire face with white face paint
Step 2- Took a hot pink eye shadow and drew circles around my eyes
Step 3- Took more hot pink shadow and went over the circles
Step 4- Put on liquid liner on the top and bottom of my lashes (smudged out the bottom last line with a clean pencil brush)
Step 5- Used liquid liner to outline the pink circles around my eyes
Step 6- Used liquid liner to draw the outline of the webbing on my forehead, outline of swirls on my cheeks, draw my fake teeth, and flower on my chin
Step 7- BLENDING! Used black shadow and a small shader brush to blend under the webbing, swirls around my cheeks and on the outsides of my mouth under my fake teeth (on my cheeks I also used the same pink around the swirls)
Step 8- Filled in my chin with the same hot pink eye shadow that was used around my eyes
Step 9- Drew small circles all around the outside of the black liquid liner I put around my eyes
Step 10- Drew on my nose- I outlined it with black eyeliner and filled it in with black face paint, setting it with black eye shadow.
Step 11- Using clear eyelash glue and a q-tip, I placed glue around my eyes in each of the small semi-circles, tips of the flowers on my chin, random spots on the webbing and next to the swirls.
Step 12- I used teal rhinestones all around my eyes, around the the tip of the flower on my chin and near the swirls on my cheeks.
Step 13- I used purple rhinestones on the webbing on my forehead and on the edges of the flower on my chin. 

Thank you for visiting! Please #amyjunemakeup on Instagram or Twitter if you do {Sugar Skull} makeup. 

HUGS,
Amy June


Monday, October 20, 2014

Halloween Makeup Look #5 | Sexy Vampire

So, let me just say, I AM LOVING ALL OF THIS HALLOWEEN MAKEUP! I am having so much fun doing it! 

So, I attempted to do a vampire look, however, my vampire fangs didn't work out as you can probably tell (since you can't see them). They didn't fit over my real fangs properly and I didn't have glue. It was later in the evening so I didn't have time to go get glue, so I worked with what I had. ENJOY. 

EYES:

Transition shade: Red color from the BH Cosmetics 88 color matte palette. 
Crease: Matte Black shade from the BH Cosmetics 88 color matte palette.
Liquid Liner: NYC Liquid Liner (as always)
Lashes: Ardell Wispys
Bottom Lash Line: Black shadow blended out with a pencil brush with no product
Brows: Anastasia Beverly Hills Brow Whiz and Dip Brow to darker it at the bottom

LIPS:

Lip Color: Covergirl Colorburst Lacquer Balm in Provocateur
Gloss: Smashbox Ruby
VAMPIRE BLOOD- I got a lot of blood on a q-tip and tilted my head and just let it drip

Then, I just put blood all over my hands and wiped it VERY sloppily all over my check and neck.

VOILE!

If you recreate this look, or something similar, please make sure to #amyjunemakeup on Instagram and twitter. I would love to see what you do!

HUGS,
Amy June

Friday, October 17, 2014

Halloween Makeup Look #4 | Male Sugar Skull

Yes, yes, I drug my husband into this one. I wanted to do a male sugar skull makeup type of look, so this is what I came up with on the spur of the moment.


How I did it:

👻 I used white face paint all over the face, but made sure to not drag it underneath the jaw line.
👻 Then using black face paint I created the sockets of the eyes. It creases a lot, so I definately set it with black shadow as I did on all the areas on the face that I used black face paint.
👻 I drew in his hollow nose and set it with shadow.
👻 I used black shadow blended out to contour is cheek bones, forhead, and chin.
👻 Using NYC liquid liner I created his mouth, the dots on his forhead and squiggles on his chin.
Then, your look is complete.

If you do your own version of this, please #amyjunemakeup on Instsgram or Twitter and I would love to see it.

Also, I renamed my Facebook page so it would match everything of mine. The link is www.facebook.com/amyjunemakeup

Have a great day!

HUGS,
Amy
 

Halloween Makeup Look #3 | Greek Goddess

Hey Guys,

Another Halloween makeup look for you guys! This one was thought up when my friend told me that she was being a Greek goddess for Halloween and I was trying to think up ideas for her. Here is the look:


What I used:

FACE: 

  • Foundation- Armani Luminous Silk Foundation
  • Concealer- NARS Creamy Concealer
  • Bronzer- NARS Laguna on temples, forehead, nose and chin
  • Faux Gold Pearls around above my eyebrows using lash glue to adhere them
  • Gold Flakes around my forehead, underneath my cheek bone and chin. I also used lash glue to adhere to gold flakes (the flakes I found in the nail section of my local Cosmoprof beauty supply)
EYES:

  • Primer- Urban Decay Primer Potion
  • Crease- MAC Soft Brown
  • Brow Bone- MAC Shroom
  • Lid- Bare Minerals Queen Tiffany
  • Outer V- Bright coral color from the BH Cosmetics 88 shimmer shadow palette
  • Brows- Anastasia Beverly Hills Brow Whiz
LIPS:

  • Filled my lips the same eyeshadow as used on my outer v and sprayed the brush with MAC Fix Plus before
  • Filled the center of my lips in with the same gold Bare Minerals Queen Tiffany shadow

HUGS,
Amy June

Thursday, October 9, 2014

Halloween Makeup Look #2 | MEOW!

Hey guys!

So, here is Halloween Makeup Look #2 for you! I have a few more looks planned, so please stay tuned!


I started with my regular makeup on from the day and just added additional wings to my liner. 

Eyes: NYC liquid liner
Brows: Anastasia Beverly Hills Brow Whiz 

To contour my face, I used regular bronzer, but then around my hairline and chin, I used a golden yellow eyeshadow to give my skin a more yellow look. I contoured my nose and used the same brown shadow to create my cat mouth area. I blended it all out with a large stippling brush.

Cat Nose: I used black face paint and a Real Techniques brow brush.

For my markings and whiskers, I used NYC liquid Liner.

My bottom lip is just white face paint! 

Thank you for reading. Please let me know what looks you would like to see next!

Until next time...

Hugs,
Amy June 

Sunday, October 5, 2014

Halloween Makeup Look | #1- zombie, bride, etc.

So....tis the season for AWESOME makeup looks. I love seeing all of the tutorials and makeup looks that people come up with during the Halloween season. I, myself created my first look of the season. This look could be a zombie, a bride, anything that is dead and sexy! Here are a few photos and then I will walk you through step by step what I did. ENJOY! 


PRIME:

  •  Prime face with any face primer.
  •  Paint face, neck, ears with any white face paint. I got mine at Michael's.
  • Prime eyelids and around under eyes. I used Urban Decay's Primer Potion.


EYES:

  • I started with my brows. Using any deep red eyeshadow and Fix Plus by Mac Cosmetics fill in your eyebrows however you wish.
  • Using any blue/teal eyeshadow use a large fluffy eye brush to blend it in the crease.
  • Use a dark blue shade further down into the crease to blend up into the lighter shade.
  •  Take any black eyeshadow and pack it on the lids, concentrating the darkest part toward your lash line.
  •  Take the same black eyeshadow and pencil brush and start creating the smokiness underneath the bottom last line. 
  •  Blend the black out with the same blue-teal shade you used in the top crease.
  • Line your top lid with liquid liner. I used NYC liquid liner.
  •  Coat your lashes with mascara and place any false lashes of your choice on your top lash line.

FACE:

  • Start by using a small shadow brush to carve out your cheek bones using a teal shade. Then, blend out with a large fluffy blush brush.
  • Use the large fluffy brush to place the teal all of your face lightly.
  • Using the small shadow brush again, contour your nose starting at the inner part of your eyebrow. Then a little bit above your lip (where you would usually highlight)
  • Using any liquid liner of your choice start drawing on the "cracking" underneath your eyes, then move to your forehead, chin and side of lips.
LIPS:

  • Using any bright red lipstick, fill in your lips. You can use liner if you wish for longer wear. 
  • Use a darker red/brown gloss and place that around the edges of your lips.
Then...Viole! You have created yourself a sexy, bride, zombie, dead type of person! 

Let me know what looks you would like to see next in the comments below! Have a great day!

HUGS,
Amy June

Friday, October 3, 2014

Wedding Prep | Favorite products

Hey guys!!! 

So I have been doing weddings lately, as always! I wanted to share a few day of prepping products. 


1. Urban Decay Setting Spray

2. Ardell Lashes in various lashes (Demi wispy is favorite)

3. Jane concelaer in light

4. Cotton rounds

5. Mascara wands

6. Lipstick is Essence of Beauty Mauve

What are your favorite prepping products???

Hugs,
Amy June

Wednesday, October 1, 2014

September Favorites | what made the cut?

So... I haven't done a favorite blog post in a while mostly because I have been busy and they do take longer to do. But, enough with lame excuses! There is always time, right? Let's just jump right in.

1. Urban Decay Primer Potion: a big shocker, right??? I think this would make the cut every month. I have purchased so many of these, I don't even remember how many. I use it on myself and I also have one on my makeup kit that I use on my clients. It NEVER let's me down. Eye shadow lasts all day with no creasing. It is on the pricier side (you all know me I love a good deal) but I really don't think you can cut corners in this department. http://goo.gl/Lw7ofe


2. BH Cosmetics "Party Girl- After Hours": this features great transition shades, as well as shimmery and also so "diamond" shades which are glittery and beautiful! Each shadow is very creamy and pigmented. A lot of the makeup palettes that I have in my professional kit are by BH Cosmetics. They also make blushes, brushes, lip products and much more than I WANT to try. This palette is around $10! So you can't beat the price. You can get it at http://goo.gl/TAItjc


3. Josie Maran Argan Cleansing Oil: in the beginning of the month, I did a little shopping on Sephora.com and came across a Josie Maran skincare kit. I have been wanting to try the oil since my skin gets a little drier at the end of summer (I am still debating if it is a "love it or leave it"). But, the cleaning oil is great! I put it dry all over my face and even on my stubborn mascara, add a little water and it creates a milky consistency and I rinse off. It removes ALL of my makeup wonderfully! http://goo.gl/SUQ4BO


4. Equate Makeup Remover Wipes: these are from Walmart. YES WALMART! However, they are the best makeup removing wipes I have tried. They are about $4 and you get quite a bit. I use these for when I wear a heavy amount of face makeup. I usually just remove my foundation and eye browns with this and use the Josie Maran Cleansing Oil for my eyes as it requires less tugging. Also, if I am just being lazy, I use these! (we all have those days, don't deny it!) :)


5. NEW! Milani Matte Lip Color in Enchanted Amethyst: this is truly matte! I love how it goes on and the color is an amazing cool, but bright purple. They have two other shades they launched as well, but the CVS that I went to people had tried them, so I passed, sadly. http://goo.gl/fyKcZY


What has been your mist favorite product this month? Please let me know in the comments below so I can try it out!

Until next time...

Hugs,
Amy

Hot in Cali | Fall nails? Why not?

I have been doing my nails a lot lately. Mainly because they have been chipping quick as I have been so busy with my BeDazzleYou business and glue gets stuck to them. Here is my most recent look. What are your thoughts?

Sunday, September 28, 2014

Wedding Makeup | christine & aaron say "I do"

Yesterday was a very long but awesome day for me. Weddings are always so rewarding especially when people compliment. Besides my horrible back ache, that is the only negative thing I would have to say.

Below I will share a few photos with you from the wedding. All of these photos are unedited and taken on my iPhone 5s. ENJOY! 

Some of my makeup set up! Getting ready to dig in and paint some faces! 

The beautiful bride on her special day! 
(I did use a Dinair airbrush machine and makeup to smooth out their complexion. I also airbrushed the brides chest and tan lines the best that I could.)
The brides gorgeous sister!

I wish I would have taken more photos of the bridesmaids, everything was just moving so quick. Since Christine is my friend, my husband met me there and we stayed for the wedding. We had a BLAST! I am pretty tired today.

Let me know if you guys have any looks that you want to see. Or if you would like products deets.

Hugs,
Amy


Thursday, September 25, 2014

Lashes, lashes, lashes | I spy with my little eye {Halloween}

Look what I saw!!! I just love seeing all the makeup that comes out during Halloween season. It is so FUN!!! I already picked up some Wet n Wild glitters which I plan on doing a look with VERY VERY soon! But, for now, BAM! 

 New Ardell SPIKY! Can't wait to try some of these for different dramatic looks!

If you have tried them, please let me know your thoughts or share your looks with me on Instagram @amyjunemakeup

Hugs,
Amy

Tuesday, September 23, 2014

My go-to fall makeup look | Soft Eyes & Bold Lippie

Hope everyone is having an amazing week. Besides my son being sick, I wanted to get up a look I did this past weekend. It has been my go-to fall makeup look for the past few years! HAPPY FALL!


Products Used: 

Eyes: 
  • Primer- Urban Decay Primer Potion
  • Crease- Random palette (orangey-brown) shadow blended out with MAC Soft Brown 
  • Lid and brow bone- MAC shroom
  • Liner- NYC Liquid blended out with Makeup Geeks shadow in Corrupt
  • Brows- Anastasia Beverly Hills brow whiz in blonde, set with Maybelline Clear mascara used as brow gel (I love it and its like $4 bucks)
  • Mascara- Maybelline Pump it up Colossal Volume (pink tube)
  • Lashes- Ardell Wispy


Face:
  • Foundation- Revlon Color Stay in 240-Medium Beige. I get the normal-dry formula even though I have combination skin because I feel like it gives good hydration with good coverage.
  • Concealer- Maybelline Fit Me! concealer in Light (this is a little dark for me now, but worked better for me when I was more tan.)
  • Powder- Rimmel Stay Matte in the color 011-Creamy Natural
  • Bronzer- NYC 720A Sunny
  • Blush- Wet N Wild Pearescent Pink
Lips:
  • Liner- I used NYX in Auburn
  • Lipstick- Milani Cosmetics in Cabaret Blend
(I also moisturized my lips before I put my eye makeup on so they were ready for liner and lipstick, I used vitamin E oil that I squeezed out of a capsule. Works great!)

As you can see, the majority of the product I used were drug store, so definitely affordable. I love finding inexpensive but GREAT products at the drug store. A major favorite of mine lately is the Milani Lipsticks. I love the gold packaging, the way the lipstick smells, it is not drying and stays on pretty well. 


This is definitely a go-to look for me in the fall. I do switch up the lipstick of course. But, in the fall I get out of my comfort zone and try to use darker colors. (I usually stick to pinks and mauves year round). 

If you have any questions, please feel free to leave a comment in the box below.

XOXO,
Amy


Saturday, September 20, 2014

Weekend makeup sale! | BH Cosmetics

Hey Guys,

Just wanted to jump on real quick to let you know that this weekend BH cosmetics (one of my favorite makeup websites for inexpensive pallets) is having a shipping special! 

Head on over to www.bhcosmetics.com to snag you deals today! 


Xoxo,
Amy

Friday, September 19, 2014

Re-vamped LOGO! | excited

So, my logo got revamped by my friend Robert! I love it! Check it out below. If you need a logo, website design or any design, please contact Robert at squids419@hotmail.com, he will make sure you are taken care of! 


XOXO,
Amy

Friday, September 12, 2014

Natural day makeup | + new favorite lipstick!

Hey guys! 

So, I wanted to share this easy to wear everyday makeup! If you want to see exactly what I used, please keep reading! 

 
Highlight: Makeup Geek Ice Queen

Crease: Mac Soft Brown 

Lid: Makeup Geek Shimma Shimma

Liner: NYX Liquid Liner

Bottom lash line: Black eyeliner blended with Mac Soft Brown

Mascara: Maybelline One by One

Lips: NYX #529

XOXO,
Amy

Friday, September 5, 2014

Sneaky Peaky | BeDazzleYou™

A little sneak peak on what I have been working on with my small business. 

FINAL PRODUCT:


Xoxo,
Amy

Thursday, September 4, 2014

My Vegas Experience | August

This August was my first time to Las Vegas, NV since I was a kid when I used to go with my dad. I got invited to go for my friend Christine's bachelorette party. Here are photos of what my weekend looked like. ENJOY!


(This is where we stayed. This is the Rumor Boutique, it is off the strip across the street from Hardrock Cafe.)

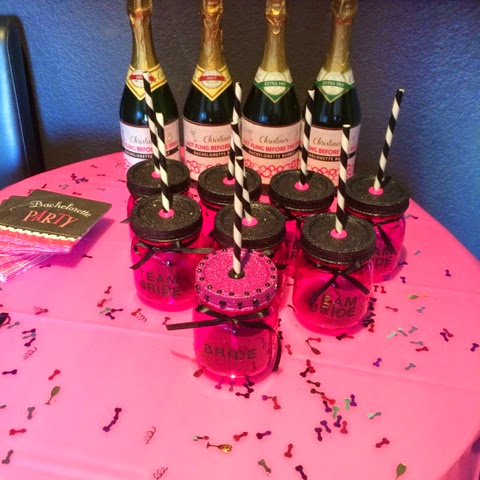
LET THE DECORATING BEGIN...


Friday night we went to eat at the Pink Taco inside the Hardrock Cafe hotel. I was really excited, but sadly disappointed when their margaritas were pretty small and weak for $16. Nonetheless, the food was good and below of some photos of my "Friday night look".


After dinner, we went and gambled a little bit and then went to bed.

SATURDAY:

We woke up fairly early on Saturday to get ready to go to brunch at The Wicked Spoon inside of Cosmopolitan. The Cosmo was a beautiful hotel. The buffet also had EVERYTHING you could imagine from sushi to pasta to breakfast food to a gelato bar. And of course, unlimited mimosas and margaritas! We had a fun time. After that, some of us layed by the pool and some napped. I napped. Haha. 

Later that evening, we got ready to take Cheistine to Thunder Down Under! I did Christine and her sisters makeup for the show, along with mine. There a few photos below of our looks and the night.


The show was fun! So much entertainment. The bride even got pulled up on stage and a little bit molested. It was awesome, and she enjoyed it even though her facial expressions looked a little worries. Haha.

After that we went to downtown Las Vegas and listened to a band play and then gambed inside The D hotel and casino. I started feeling a little lightheaded and dizzy from lack of water and all the cigarette smoke that a few of the other girls and I took a cab back to the hotel. 

Sunday, we went back to The D (downtown) and gambled a little but more. I didn't lose any money as I mostly watched for free of losing money.

But, that was my trip in all. I will being the makeup for Christine's wedding at the end of this month. I will be sharing my experience and photos as well! So stay tuned! 

Xoxo,
Amy